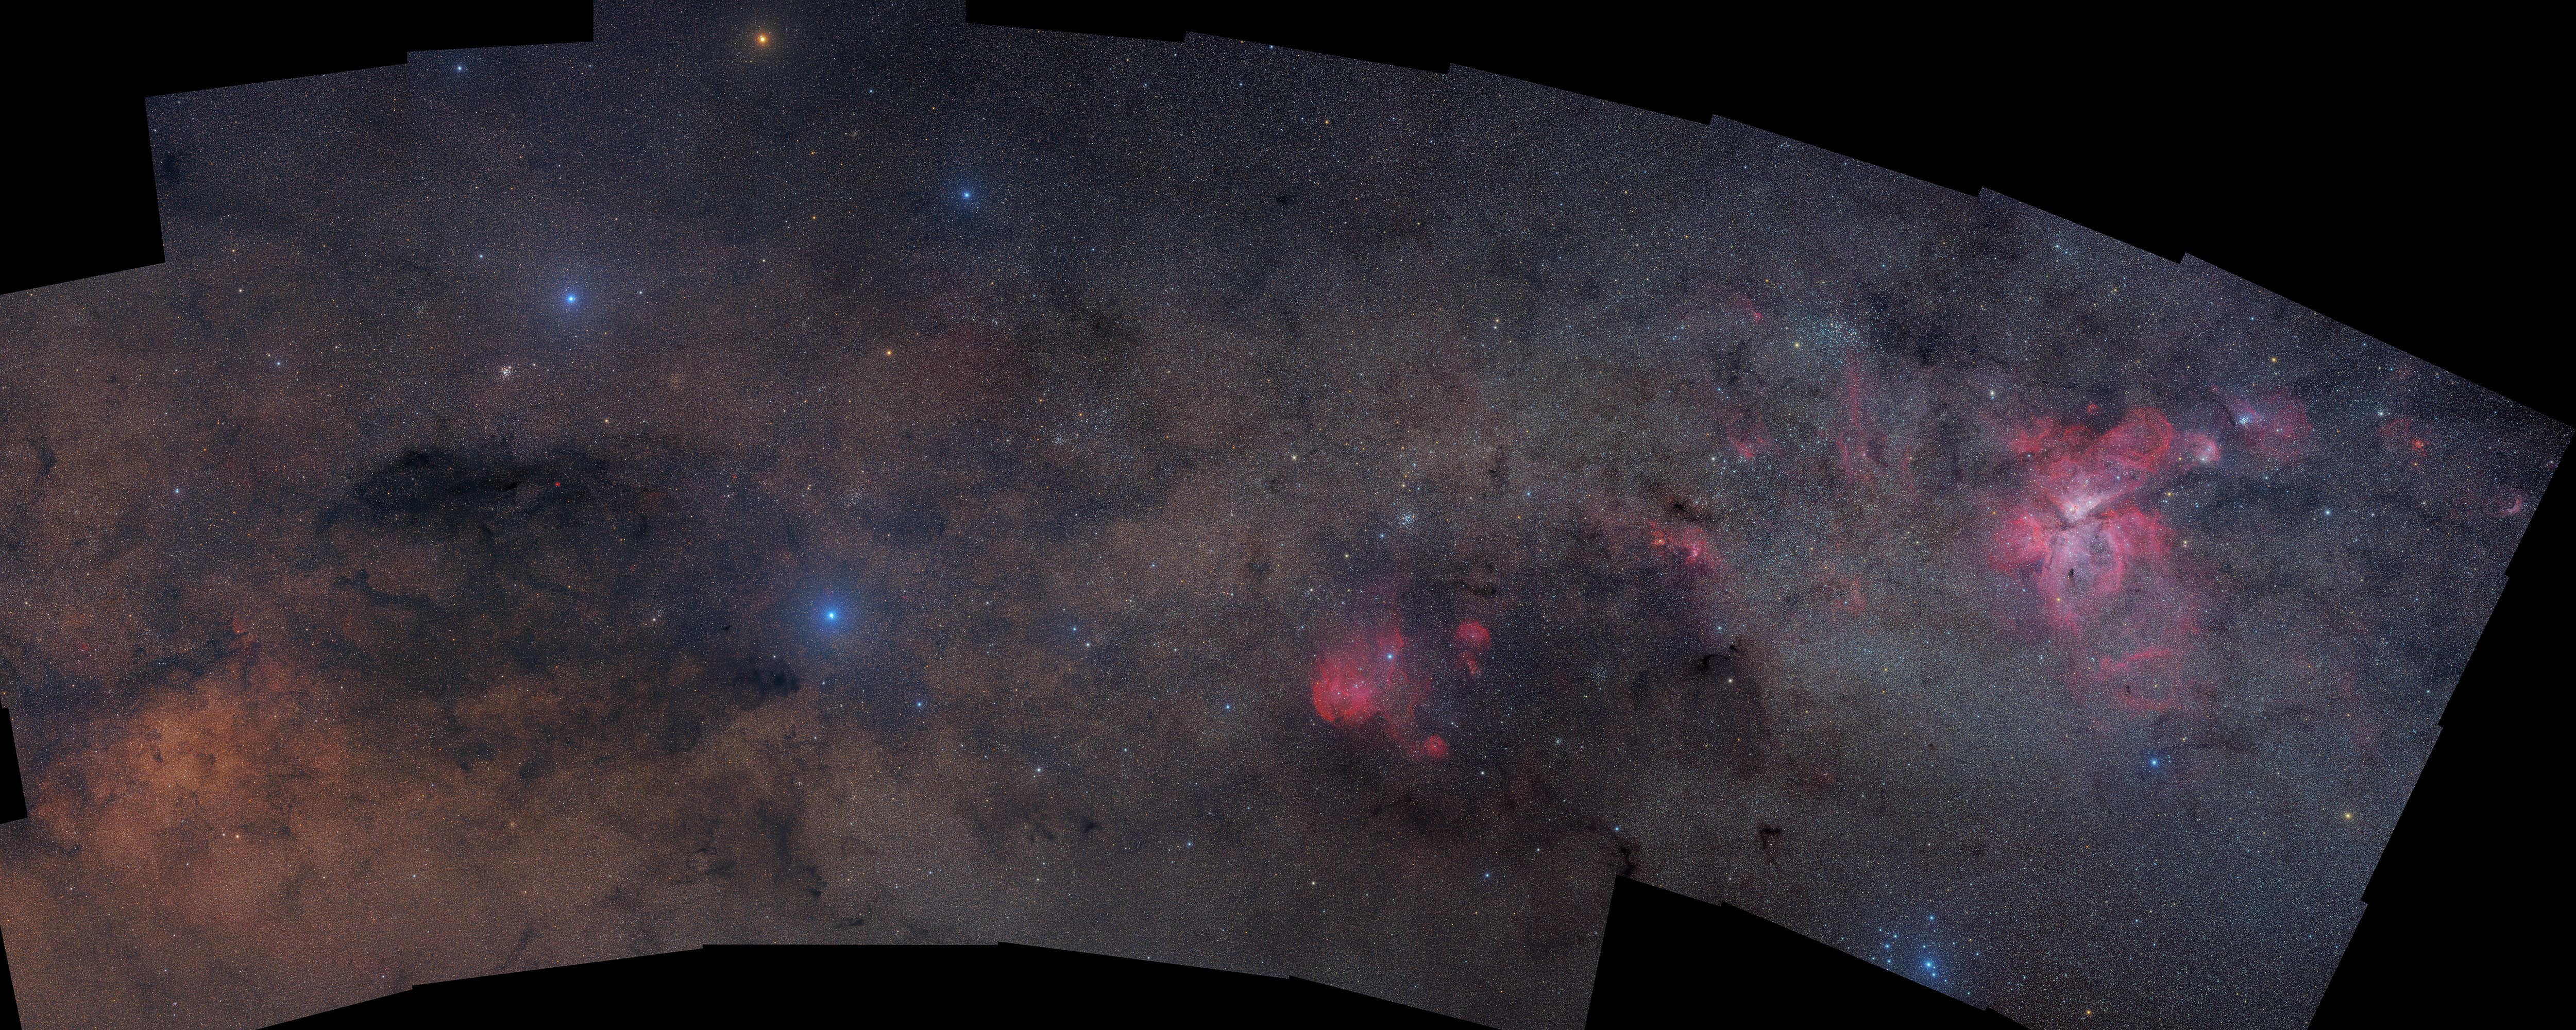
Crux-Carina mosaic details |
|
 |
|
The image was produced from 123 5-minute exposures taken by Rajiv Gupta with a 4-inch Takahashi FSQ refractor on an ASI094MC camera (36-MP, full-frame, one-shot-color). The exposures were taken across 43 distinct frames. Most frames included three exposures but a few only two. Each frame covered 10 square degrees but because of overlap the extent of the mosaic is only about half the sum of their areas. Click on the image to return to its main page, where you can view or download a 30000 x 12000-pixel version. RegiStar 1.0.10 was used to dark subtract and flat field the raw exposures, and then register, calibrate, and combine them, mostly using bulk, scriptable commands. Adobe Photoshop was used to adjust color and contrast and resize the mosaic. Details are given below. For specifics on the RegiStar commands referred to, please see the RegiStar Help system. The various folders and subfolders referred to below were created to logically guide the processing and allow RegiStar’s bulk and scripting commands to be used efficiently. |
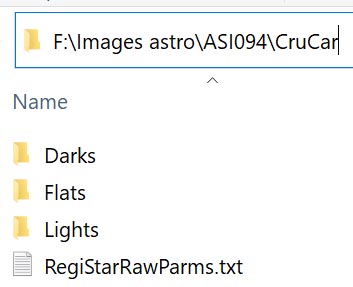
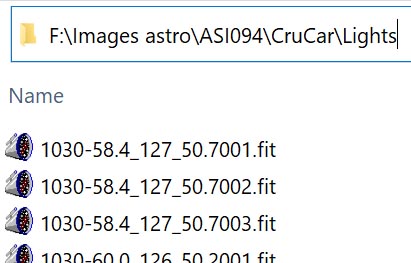
STEP 1: Preprocessing and Parameter AssignmentOriginal images were all in FITS-raw format, with Bayer array RG/GB. All light exposures, taken at camera temperature −10°C, were placed in the Lights subdirectory of the base directory F:/Images astro/ASI094/CruCar. Ten dark frames taken at the same temperature were placed in the Darks subdirectory. Five flat fields (taken in daylight using a clear sky) were placed in the Flats subdirectory.
One of the light exposures was opened and determined to render well using color multipliers
1, 1, 1.5 and with gamma value 0.78 in its Display Control. To apply these values to all
images, a
RegiStar raw-parameters file with the single line
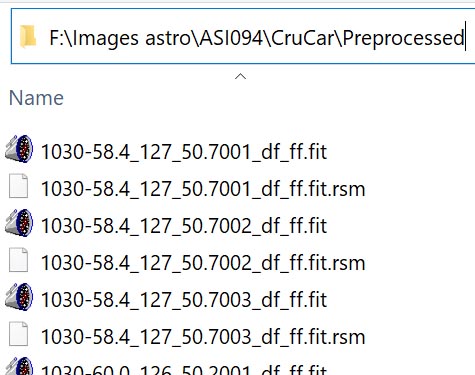
Assigning precise color multipliers to raw images before preprocessing is not necessary, but ones that are roughly correct should be put in place before the images are registered. Otherwise, large color adjustments may be needed using another program, e.g. Photoshop, after processing by RegiStar is completed. Display Control parameters including a gamma value do not need to be set until just before a finishing Capture Display operation (see STEP 3) is done. Setting all parameters at this stage is convenient as it eliminates the need to do so later, and it also allows newly created images to be checked in real time. The darks and flats were opened as such in RegiStar, and then a master dark and a master flat were created by doing Combine/median operations on the individual darks and flats. Using two bulk Preprocess commands, the master dark was applied to all lights and then the master flat was applied to the dark-adjusted lights. The dark- and flat-adjusted lights were saved in the Preprocessed subdirectory. The interactive preprocessing outlined in the paragraph above is captured in this preprocessing script, which is a variant of a sample script included in the RegiStar installation directory. The preprocessing could all have been done instead by running this script. |
|
||||
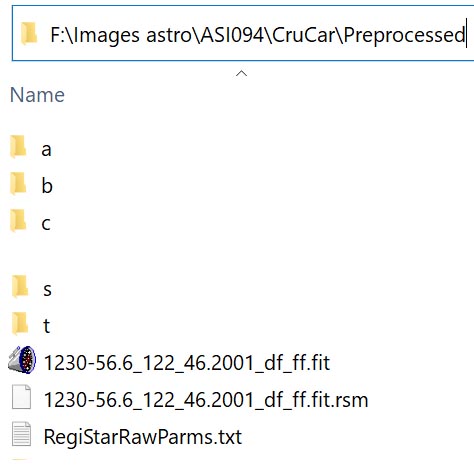
STEP 2: Register, Calibrate, CombineBefore the 123 images in the Preprocessed directory were registered using a single multiple-source Register command, they first had to be organized so that each image had some overlap with a previously registered one. Images are ordered lexicographically (or alphabetically) in bulk operations. Exposures when acquired were assigned names beginning with their RA (hhmm) and Dec (-dd.d). RAs ranged from 1030 to 1330 and Decs from −56.6 to −65.2. Selecting the first image, which with this naming was the top-right image 1030-58.4..._df_ff.fit, would work but would lead to large geometric distortion at the left of the mosaic. Instead, a more central image 1230-56.6..._df_ff.fit was selected as the base image. The other 122 preprocessed images were placed into 20 subdirectories a, b, c,..., t of the Preprocessed directory. Each of these subdirectories contained images with a common RA. Images in subdirectory a all had RA 1230, those in subdirectory b had the adjacent RA 1225, those in c an RA, 1235, adjacent to that in a or b, etc. With this arrangement, as shown at the right, the 122 images in subdirectories of the Preprocessed directory were registered to the base image. The Register command was run with the options to Include subdirectories and Save registered images in the Registered directory. By default, the images would have been saved in TIFF format. However, FITS format was used since saved FITS images include a useful record of processing history in their headers. Accordingly, the Preferences > New Images > Raw input to non-raw output file type option was set to FITS instead of the default TIFF. Next, a bulk Calibrate operation was performed, to even out variations between the images. The image 1045-60.0..._df_ff_reg.fit, which included the Eta Carinae Nebula, was chosen as the calibration reference image. With the All open images in the current image group and Close original image(s) after calibration options selected, the Calibrate command produced 122 _cal images, which were saved using a Save All operation into the Calibrated directory. The images were saved in FITS format because of the Preferences option mentioned above. At this stage, 123 images were open: the calibration reference image 1045-60.0..._df_ff_reg.fit and 122 _df_ff_reg_cal.fit images. A Combine/median command was then used to combine all 123 images and produce the initial (see STEP 4 below) draft of the mosaic, which was saved in FITS format as CruCarMosaic.fit. The interactive preprocessing outlined above is captured in this mosaicking script, which is a variant of a sample script included in the RegiStar installation directory. The operations given in this step, after the organization described in the first paragraph, could all have been done instead by running this script. 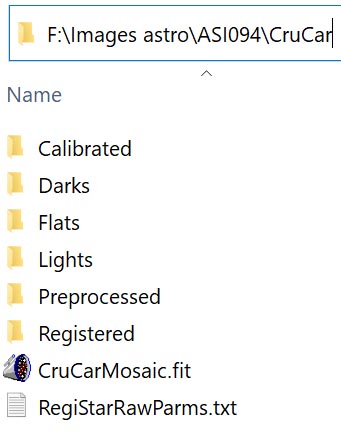
|
|
STEP 3: Adjustment and Sizing in PhotoshopPreprocessing and processing described above was all done on 16-bit linear data with files saved in FITS format. The resulting 7.6-GB mosaic CruCarMosaic.fit was converted into an 8-bit, gamma-adjusted image using a Capture Display command. Display parameters, and in particular the gamma value 0.78, had already been set as described in STEP 1. They could instead have been set here, before the command. The Capture Display output was saved as CruCarMosaic_dis.tif. Routine Curves and Levels adjustments were performed in Photoshop on the compact 8-bit CruCarMosaic_dis.tif image, which was also cropped and resized, to produce a first draft of the final image. Since adjustments at this stage were small, 8-bit data sufficed. |
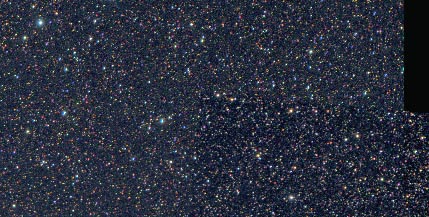
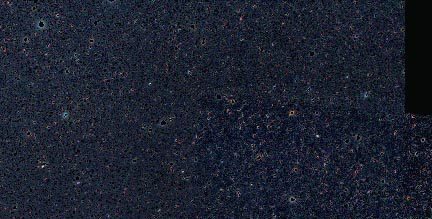
STEP 4: The Art of Artifact EliminationThe bulk Calibrate operation in STEP 2 largely removed brightness variations between adjacent images and also balanced their color. For a smaller mosaic, of half the extent or less, the first draft from STEP 3, resulting from the blended Combine of the calibrated images in STEP 2, would likely have been free of visible artifacts. However, for this large mosaic, small variations in sky brightness unfortunately accumulated. Also, reflection from bright stars affected adjacent frames differentially. These effects led to about half a dozen visible seams and also a background color shift across the mosaic. The color shift was removed by staging the calibration. Instead of a single bulk Calibrate, four operations were performed. First, the most central 16 of the 43 frames were calibrated and combined. Then 21 immediately adjacent frames were calibrated to the resulting central partial mosaic. The third Calibrate operation handled the lowest 5 frames and the final one the solo top frame including the problematic bright star Gacrux. Reflection from the Southern Cross’s alpha star Acrux also was an issue. The staging overcame these complications and prevented color cast arising from variable background brightening from propagating across the mosaic. Windows File Explorer was used to ease selection of images in the Registered directory required for the staged calibration. For example, the search pattern *58.4*.fit was used to select frames of Dec −58.4 that were included in the central partial mosaic. The selected images were dragged from the File Explorer window to the RegiStar window, thus avoiding the tedium of individually selecting the many involved images. Also, Windows Task Manager was used to monitor progress during sometimes lengthy periods of unresponsiveness because of several GBs of I/O. The staged calibration also eliminated the most visible seams. The remaining few faint seams required additional measures: (1) individually calibrating one frame to a different one than that used for its corresponding bulk operation; (2) cropping two frames to reduce the extent of their associated seams; and (3) applying a very gentle Burn tool in Photoshop. The manual recalibration in (1) was guided by the history of its prior bulk calibration given in a FITS header. Seams at this stage affected only the faintest background pixels. The rich starfields made precise application of the Burn tool in (3) difficult, since the stars hid the seams. So, (3) was performed on the background-only mosaic after its stars had been found and removed by RegiStar, and then the stars were added back to the Photoshop-seam-corrected background using a Combine/max operation in RegiStar. The four images above show a faint seam that was removed using measure (3) in the above paragraph. Shown are: (a) the original seam; (b) the background-only image of the original seam; (c) the burned background-only image, with the seam removed; and (d) the adjusted background image in (c) Combine/maxed with the stars-only image. |
|
Home | Details | Images | Download | Ordering | Support | Policies | Auriga Imaging |